
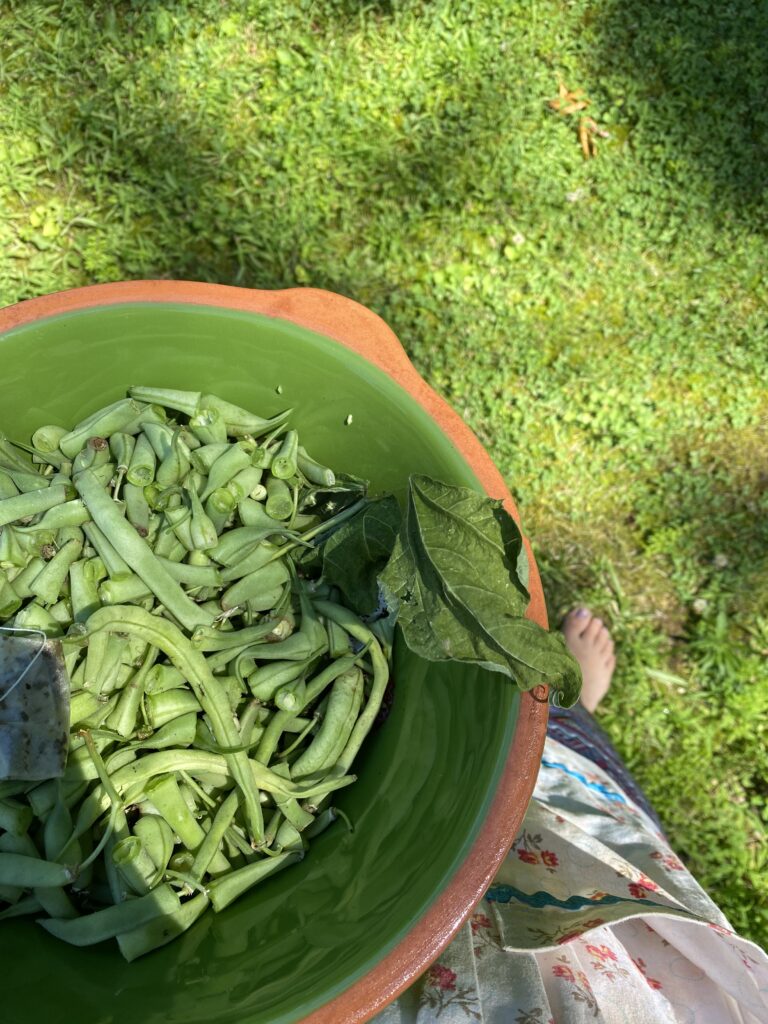
Of all the fruits and vegetables in our garden, green beans were the ones that offered the highest yield. It seemed that everyday when we went out to our little garden patch there were more and more beans. I loved watching the little shoots grow into flourishing delicious delights.
Truly there is something satisfying about planting a little seed and watching it grow into something to feed your family!
But how do you keep these little delights to feed your family until the next planting and harvesting? There are a couple different ways to go about this. Freezing is a delightful manner to preserve them, but in our case we wanted to save freezer space for our meat and baked goods. So canning was the next best route, and honestly the easier route.
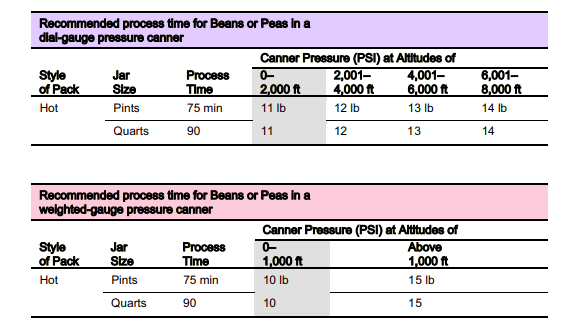
The one item to know when canning green beans is that a pressure cooker is necessary. Due to the non-acidic quality of green beans water bath canning is not recommended to properly preserve them. The only way to properly preserve green beans in a water bath canner is to raise the acidity level by pickling the green bean.
Let’s get canning!
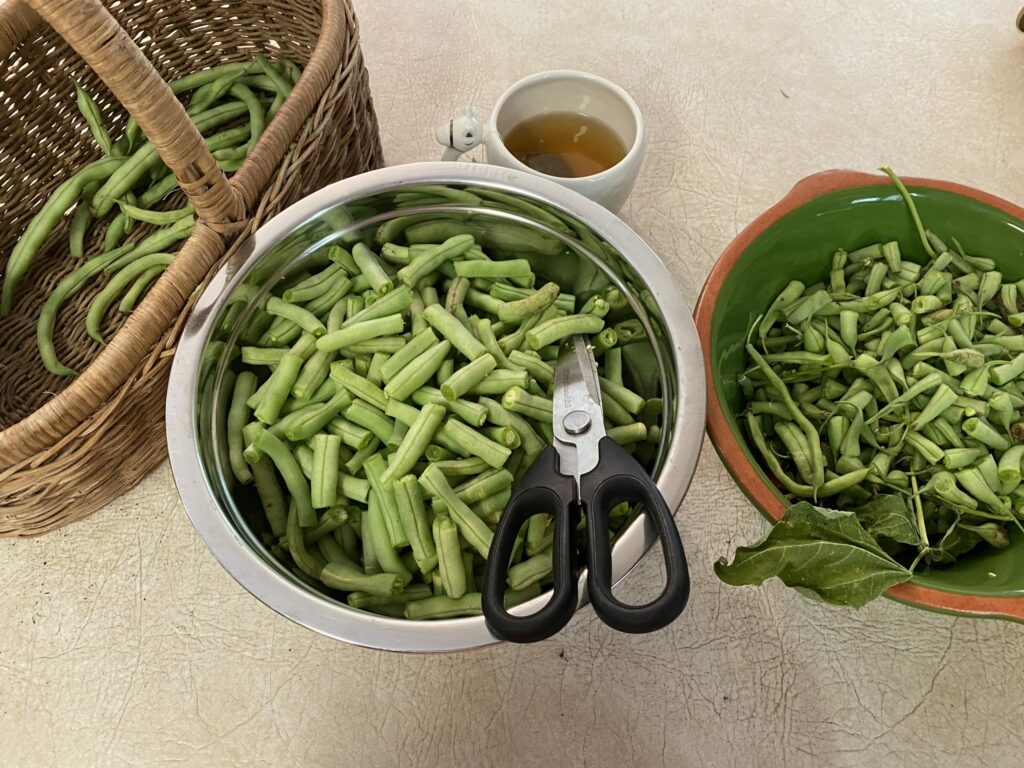
You will then need to wash and trim your beans. To do this I like to fill one side of my sink with cold water and let the beans soak, swishing them every so often to agitate any of the dirt off. If you are unsure of the growing practices of your beans I would suggest adding 1/4 cup vinegar to your water to remove any pesticides that may have been used.
Trimming beans is very easy. You can use your kitchen shears or snap the ends from the beans by hand. At this stage I also cut/snap the beans into bite sized pieces
Its time to take a step away from your beans and get your cannery ready. Add two inches of water to your pressure canner and set on the stove over medium heat. While the pressure canner is heating wash your jars in warm soapy water. Once jars are clean I like to keep them in a clean sink side submerged in the hottest water my tap can make. Heating the jars like this will help to prevent jar breakage during the processing stage.
Place a kettle of water on the stove and bring to a boil, you could also boil water in a pan and ladle into your jars, but a kettle certainly makes pouring easy.
We are now ready to start packing our jars. I like to raw pack my beans, I feel it lends to a more crisp bite even after canning; rather than blanching and canning beans. To raw pack you will need to fill your pint jars with green beans leaving a 1 inch head space. continue to push down your beans to try to fit as many in a jar as possible. once all of your jars are filled with green beans pour boiling water to the 1 inch head space. Take a debubbler or butter knife and run it around the outside of your jar and down into the middle. This allows bubbles to escape leaving you more room to pack more beans into your jar.
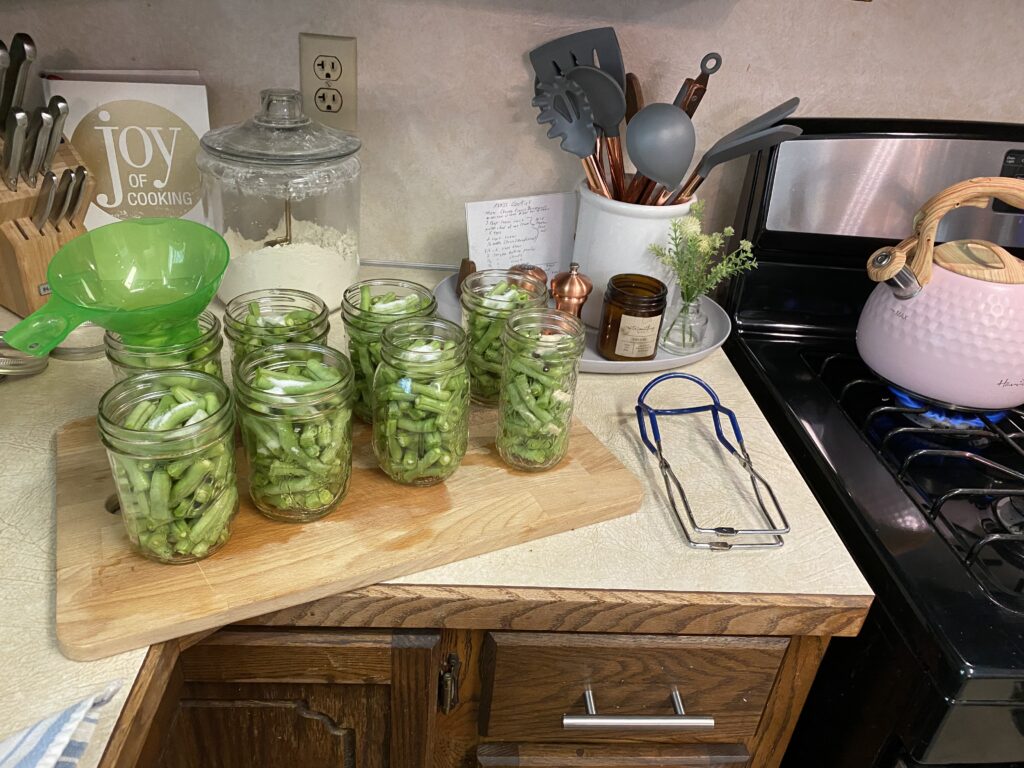
I don’t like to add a lot of seasoning or salt to my beans, as I prefer to season the beans when cooking them at a later date. However I do add 1/4 teaspoon of canning salt to each jar prior to sealing them with lids and rings. Before sealing run a cloth dipped in white vinegar over the rims of the jar to remove any residue.
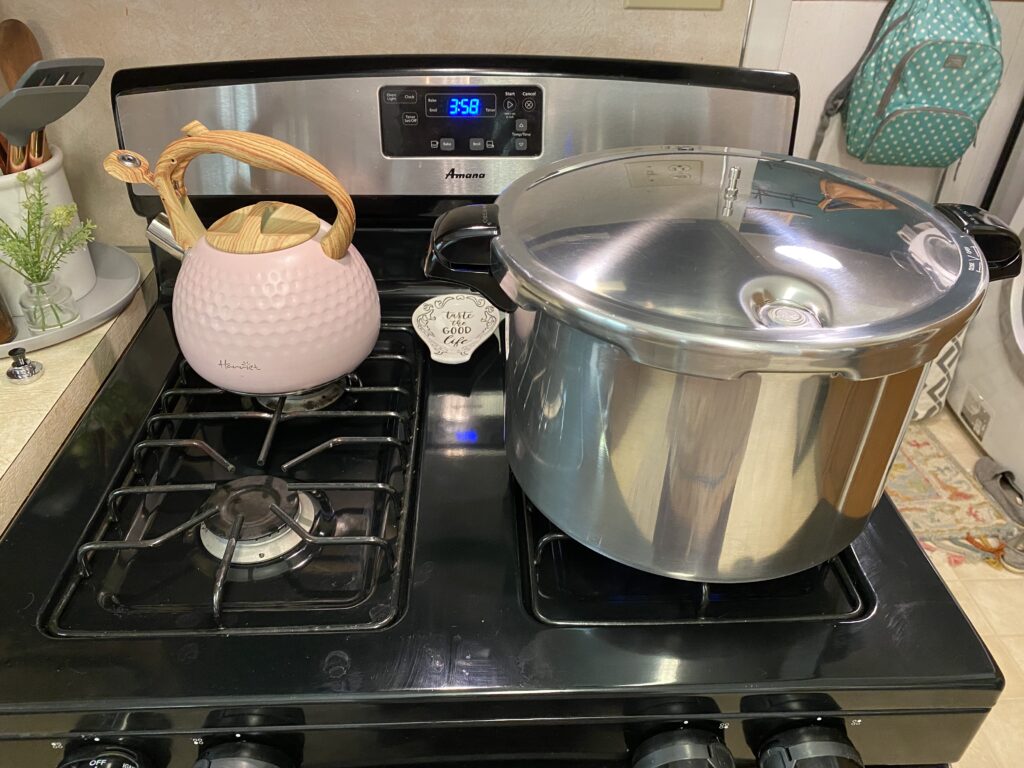
Once jars are sealed lower them into your pressure canner and seal the lid. Once the canner has reached pressure a stream of steam will begin to come from the steam valve. Allow this steam to be released for 10 minutes before placing your weight (or pressure gauge on top). Once the weight has begun to rock back and forth you are ready to start the processing time.
Once your time has completed immediately remove canner from heat and allow to depressurize natural. Do not try to speed up this process, or jars may not seal properly. When canner has depressurized remove lid and jars.
Leave jars undisturbed for 18-24 hours and then check that all jars have properly sealed.
I like to wash my sealed jars in warm soapy water and label them prior to storage.
TIPS!
Don’t throw those green bean ends out. You could toss them into a bag in your freezer to make a batch of vegetable broth later. Or bring them out to your compost pile to feed next year’s crop!
Disclosure: Some of the links below are affiliate links, meaning at no additional cost to you, I will earn a commission if you click through and make a purchase
Canning Green Beans
6
PintsIngredients
6 pounds green beans
1 1/2 teaspoons of canning salt
water
Directions
- Wash and trim your beans. Allow to soak in cold water agitating every so often to remove dirt. If you are unsure of the growing practices of your beans add 1/4 cup vinegar to your water to remove any pesticides that may have been used.
- Trim beans using kitchen shears or snapping off the ends. cut/snap into bite size pieces.
- Pour 2 inches of water into a pressure canner and place on the stove over medium heat to begin warming.
- Bring kettle of water to a boil.
- Pack trimmed beans in to pint jars leaving 1 inch head space.
- add 1/4 teaspoon of canning salt to each jar and then top with water to 1 inch head space.
- Run a debubbler around the outside and center of the jar to remove air bubbles. Add more beans if jar looks low.
- Before placing lids on jars run a cloth dipped in vinegar along the rim. Tighten rings to finger tight, they do not need to be tighter than this.
- Place jars into canner and seal canning lid. Allow for steam to escape from the steam for 10 minutes prior to placing pressure gauge or weight on.
- Wait for the pressure gauge or weight to rock steadily before starting processing time.
- Once processing time has completed, remove immediately from heat and allow pressure to release naturally.
- When pressure has released remove lid and jars. Allow jars to rest for 18-24 hours before checking if they have properly sealed.
- Don’t forget to date and label jars before storage!
Notes
- If jars do not properly seal, place in the fridge and eat within the week.
- Washing the sealed jars in warm soapy water, removes the silty dust that comes from the canning process. Rings should also be removed prior to storage to keep them from rusting.


